


We are back with a new article about how to set up a Belkin range extender which is pretty much more accessible and very cool device to plug-in anywhere in the house. There are others Belkin Wi-Fi range extender in the market but to show you the best we got Belkin N600 Dual–Band Wi-Fi Range Extender model which is right in performance as we have already tested and advise you to get connected with it and rid of the low Wi-Fi signal problem at home or in office.

This Belkin has a dual-band which allows the device to double the speed and easy to install also there is no problem to connect to any router it works with all routers. This device covers all dead spots in the house as you can see in the picture below.
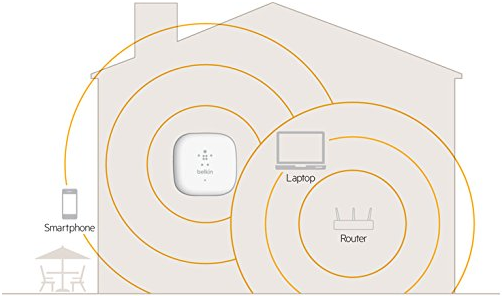
The wireless operating spectrum has the simultaneous dual-band of 2.4GHz and 5GHz. This Belkin model has Wi-Fi protection setup of 256-bit WPA2* encryption and 64/128-bit WEP encryption. You will get one LAN fast Ethernet port along with user manual CD and a quick install guide which help you easy to understand and also for the knowledge that the WPS button is at the top of the device. As you have realised actually what is Belkin and how its work now we will discuss that How to Set Up a Belkin Range Extender with the three necessary steps which very simple to start from your laptop or smartphone, so we use smartphone which is readily available any time at every hand.
Belkin Setup Step-1:
First, you have to plug-in to an outlet of where is your Wi-Fi you want to extend.
Belkin Setup Step-2:
Now in this step, you go to your smartphone or laptop, and you find the name Belkin.setup in the Wi-Fi search list, select it to continue setup.
Belkin Setup Step-3:
At this stage, you go to the website where using your wireless device with web link http://belkin.range and set it up.
These are the above simple steps that will guide you to connect your Belkin device. If you didn’t understand then here are some real photos with the details that how you can set Up a Belkin Range Extender.
Contents
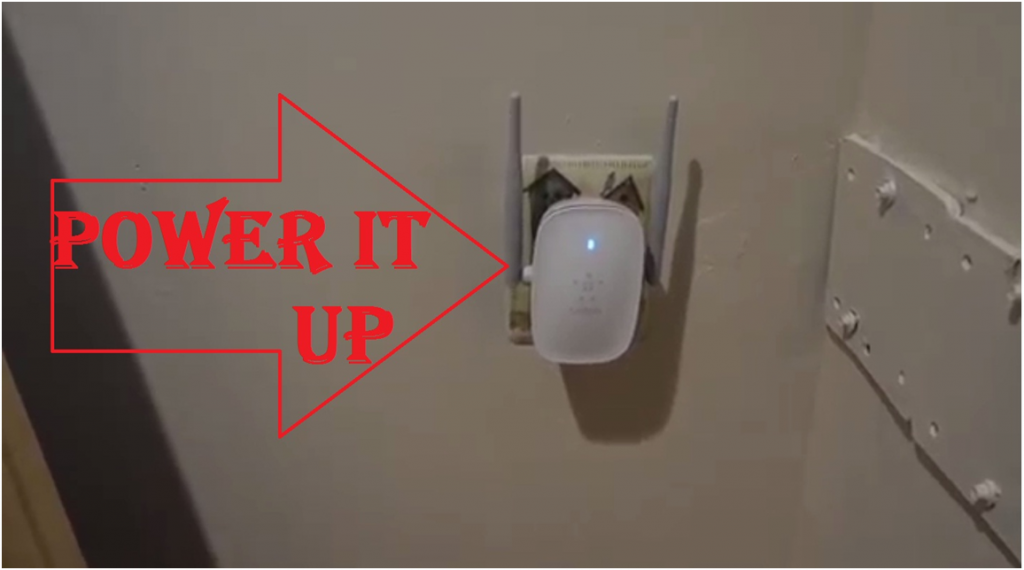
Step-1:
Once you have your Wi-Fi extender than you Plug-in.
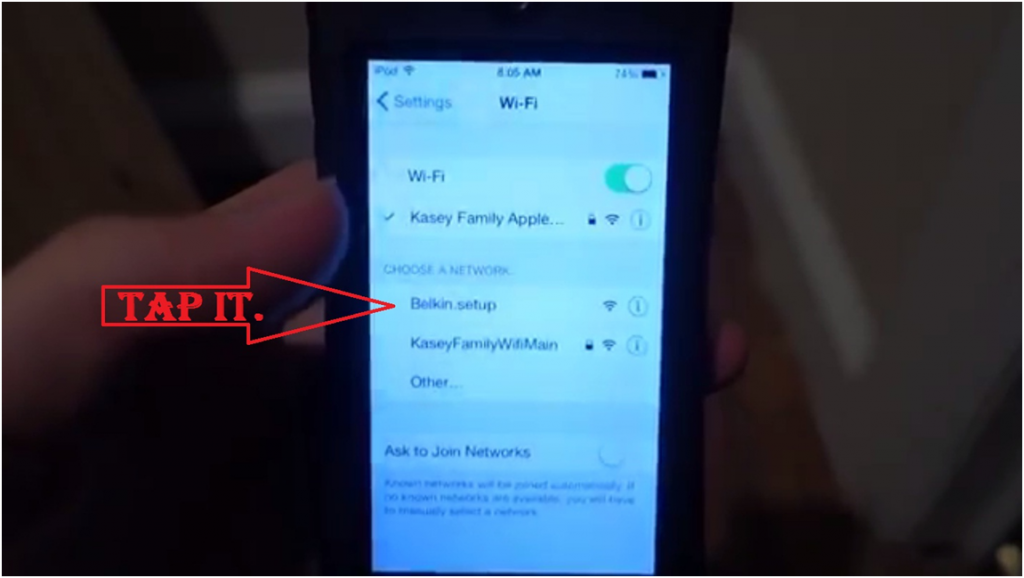
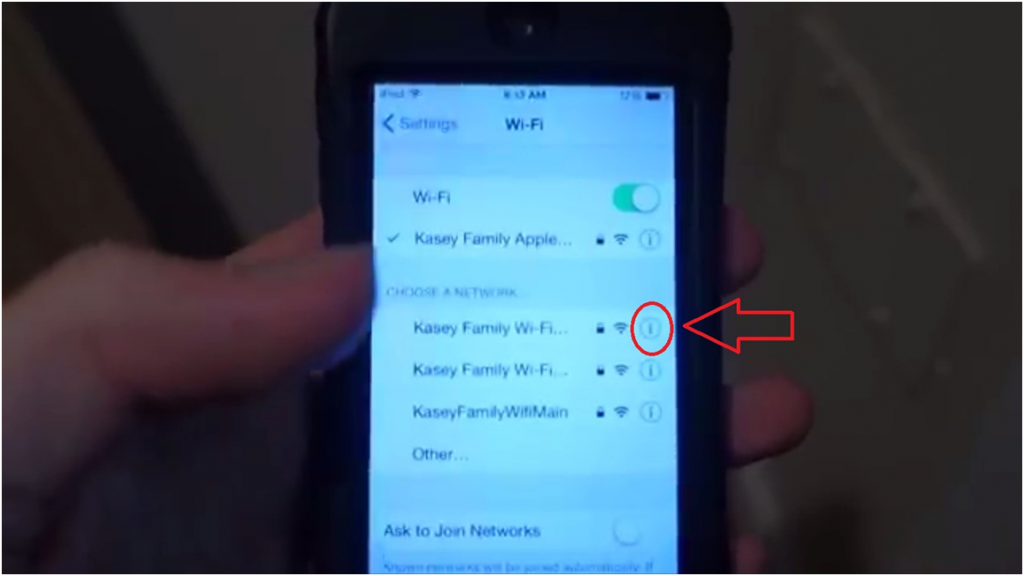
Step-2:
Now get one of your smart devices as we had iPod and go to the settings > Wi-Fi > and tap on Belkin.setup. As you can see in the photo, in case if you do not see any Belkin name on your smartphone Wi-Fi search list than your Belkin is not correctly plug-in or some other issue with the device.
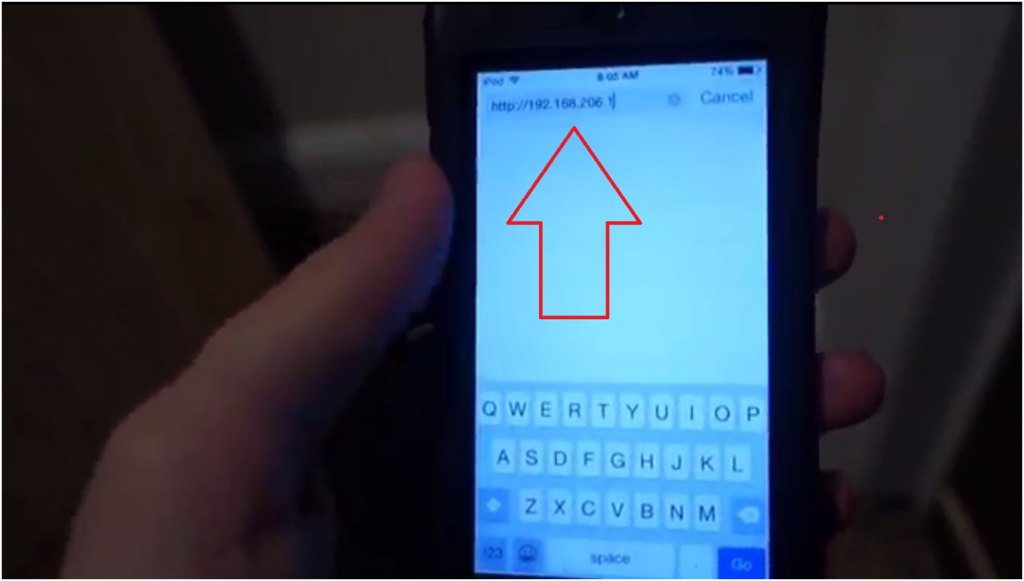
Step-3:
Now go to your browser on the same device, as we use safari and type the IP address http://192.165.206.1 you can also get the above link numbers on the card from the box.
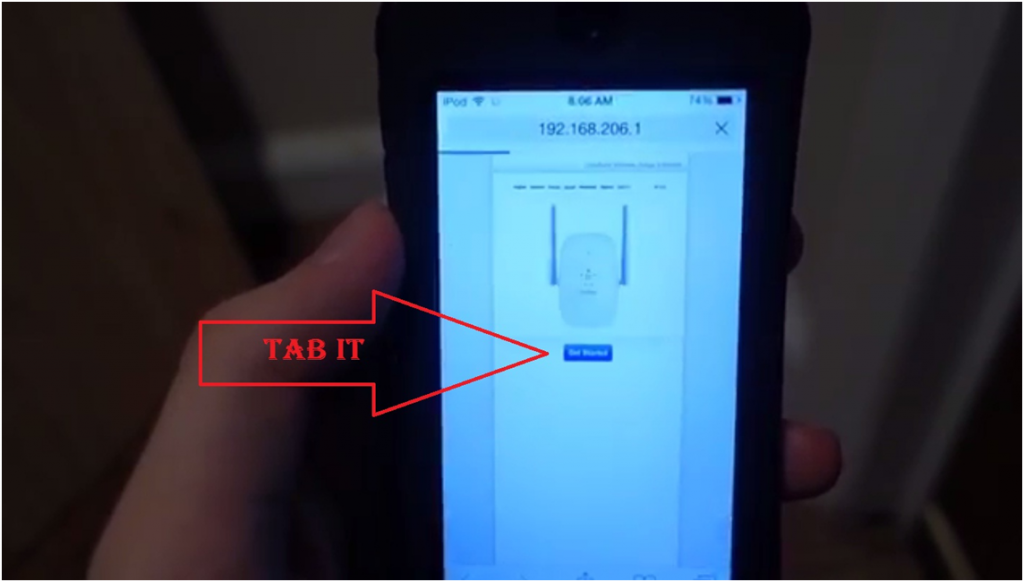
Step-4:
In this step, you have entered the Belkin page where you get the blue button named get started so tab on it.
Step-5:
Now it will automatically search for your network

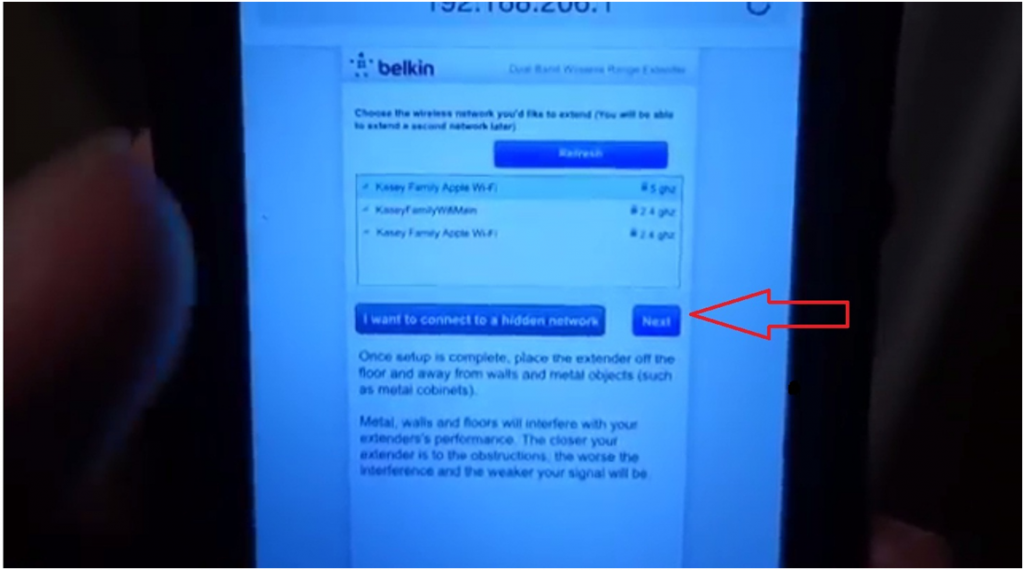
Step-6:
Then it will ask you that at which network you want to extend so select next, it will connect to it.
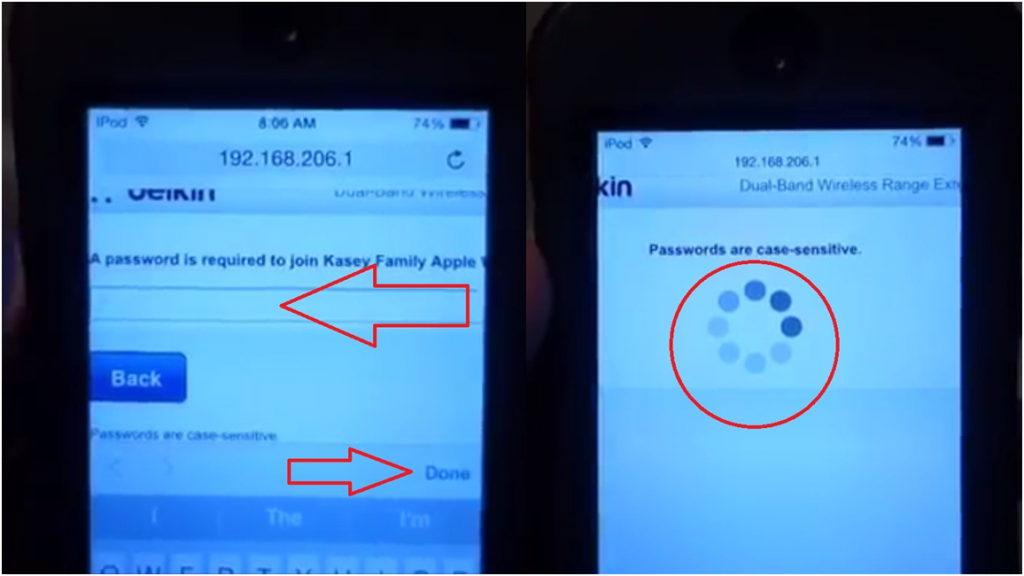
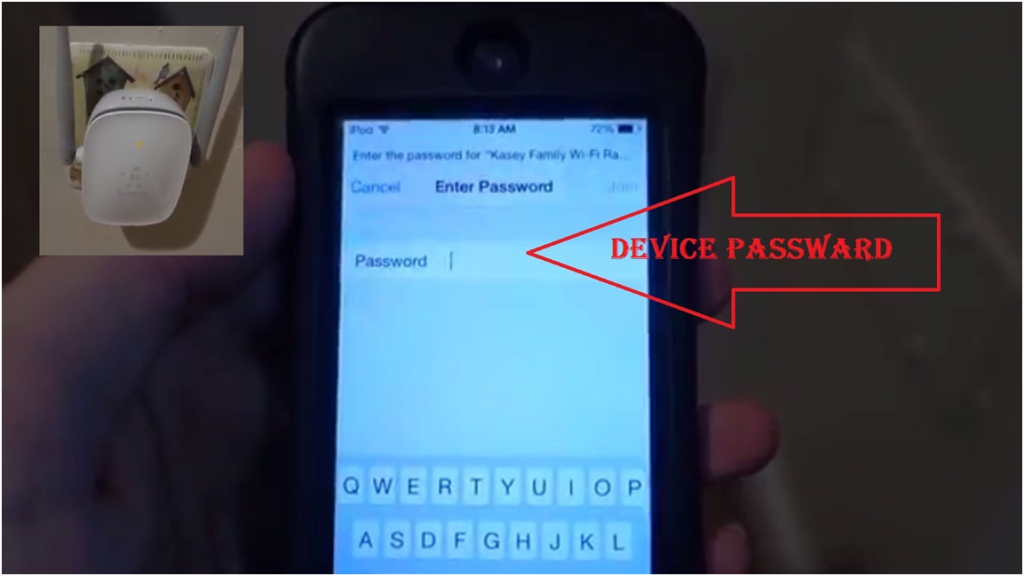
Step-7:
Now at this step, it will ask for your password is required to join your network, so type it then it will connect after you put a password and select done. Make sure that you entered the password is correct otherwise it will give any error notification which will not extend your device.
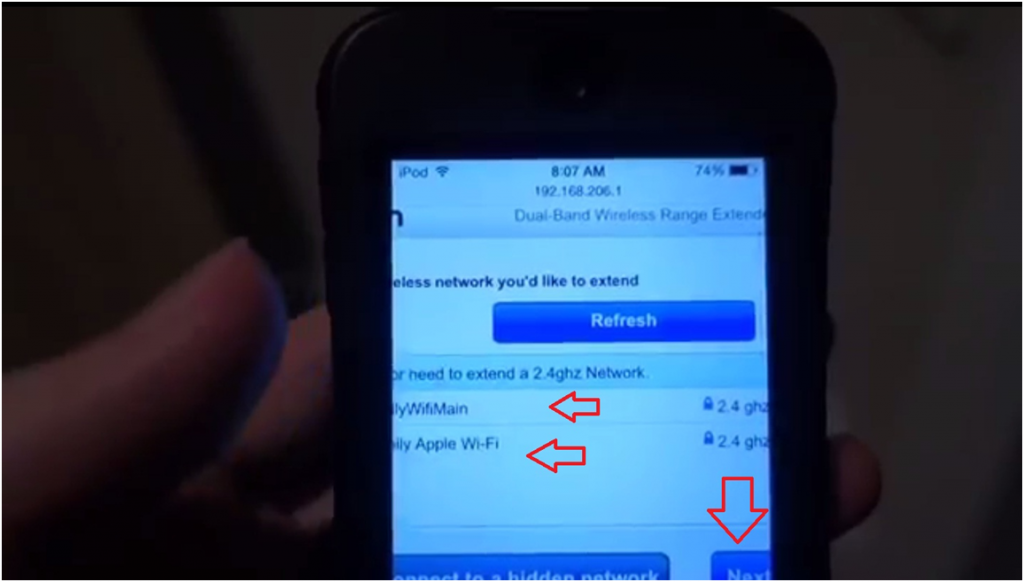
Step-8:
It will also ask you to extend the second network as you can see in the photo which can be extended up to 2.4 GHz networks. If you have two interfaces and want two connected than press the next button as you can see in the photo. It will check to make sure that the entire passwords are correct.
Step-9:
As you have correctly completed all the above eight steps then going to the settings > Wi-Fi > where you get the Wi-Fi network link so edit it. Here you will see your both network as we have selected both in the above setup.
Step-10:
As you have two networks choose any one of them to be connected and enter the password. When you come the password the light of your extender should be amberoid.
Step-11:
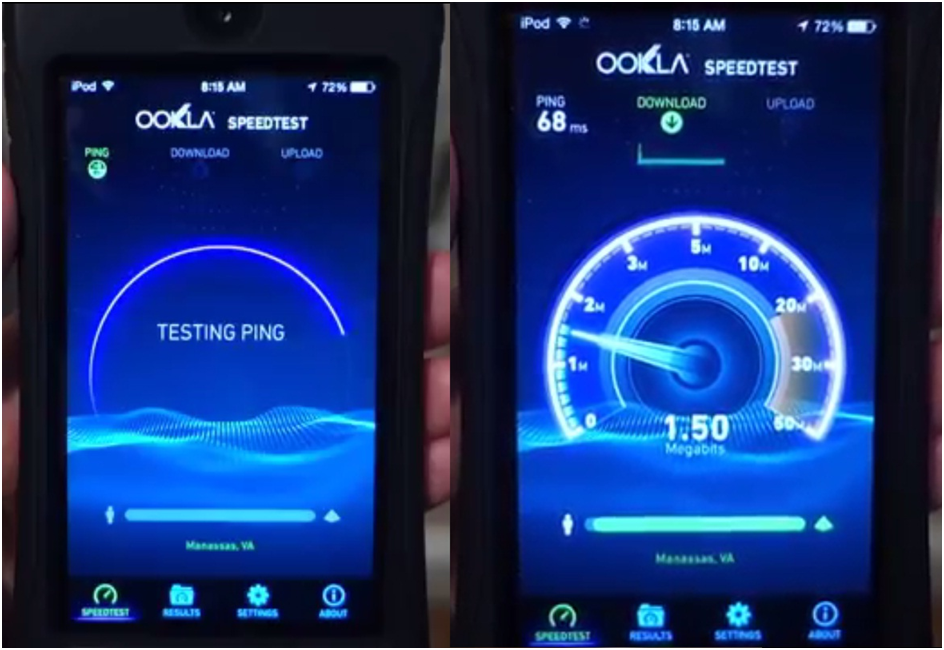
When you are connected then you can go to the speed test, as you can see i am getting the speed of 1.5 as you can see in the photo which is pretty slow due to my internet is already at the low network but you will get the high speed as per your internet package.
Now you have all the knowledge about how to set up a Belkin Range Extender as we have already discussed in details along with the photos at the above steps and we hope that this article will help you out.
STAY TUNED FOR OUR NEXT REVIEW TO UPDATE YOU.


 For Android")


