We currently live in a world that’s shrouded with a lot of external threats, including issues with connectivity and internet accessibility. If you are wondering what the significance of private DNS is and why you should enable it too, this article is for you.
To answer you in short, private DNS conceals your searches and the DNS queries are encrypted and safe from hackers and people who engage in cybercrimes.
This article will explore all the steps that go into enabling private DNS on Android and how you can simplify the process.
What is a Private DNS?
Private DNS on Android is a specific feature that allows the users to encrypt the DNS queries, which restricts your internet service provider and other third parties from accessing what you are browsing on the internet.
The main function of this feature is to ensure that your personal information and data on the internet are safe and secure and away from the prying eyes.
The moment you enable the private DNS feature on your Android device, all the DNS queries that you make are encrypted, allowing you to keep your privacy intact.
Steps to Enable Private DNS Mode on Android
If you want to enable the private DNS mode, ensure that your Android device is running on version 09 and above. This means that all the latest Android devices that you can think of have this feature.
Following are some of the steps that you need to follow:
- Start by opening the Settings app on your Android
- Tap on Network and Internet
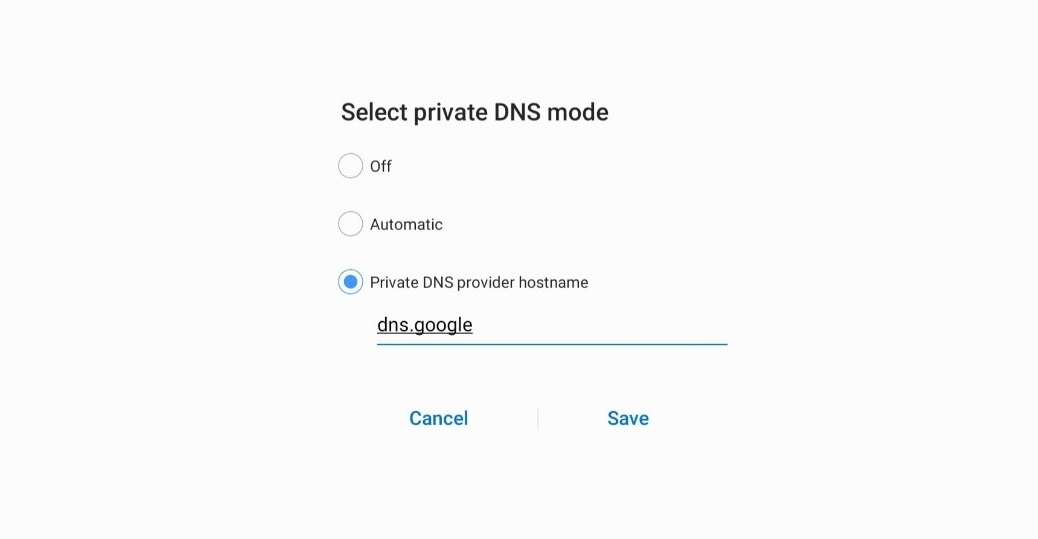
- Scroll down until you find the “Private DNS” feature
- In the designated field, you’d have to add a proper provider that ensures secure DNS
One of the most effective is https://1dot1dot1dot1.cloudflare-dns.com/And, that’s pretty much it. You have now enabled private DNS on your Android device.
Besides the private DNS, we mentioned, some of the other ones worth paying attention to are:
- Google DNS: dns.google
- NextDNS: 45.90.28.0
- Comodo Secure 8.26.56.26
- OpenNIC: 192.95.54.3
- Quad9: dns.quad9.net
- Clean browsing DNS: security-filter-dns.cleanbrowsing.org
- Open DNS: 208.67.222.222
Depending on your convenience and choice, you can pick the DNS server that you think would align the best for your needs. All the above free DNS services are great but the Cloudflare one we mentioned before seems to be the best that you can indulge in.
Conclusion
Enabling private DNS in your Android smartphone can help you out in ways that you didn’t think were possible. What we’d recommend you do is prioritize following the steps as they are mentioned so you don’t face any kind of confusion along the way.


 Online casino
